Ensuring your ice bricks are fully frozen is key to getting the most out of your cooler. In this guide, we will take you through some tips and tricks to ensure you’re a pro user for the years to come.
First, give your ice bricks as much time in the freezer as possible to ensure they are fully frozen. Freezing times will vary greatly depending on the ice brick type, the freezer you have, and the load you put on it. For example, if you have a small freezer and load it up with heaps of warm ice bricks all at once, it will take longer than usual!
Rather than stick to a specific time frame, the best thing to do is inspect them before use:

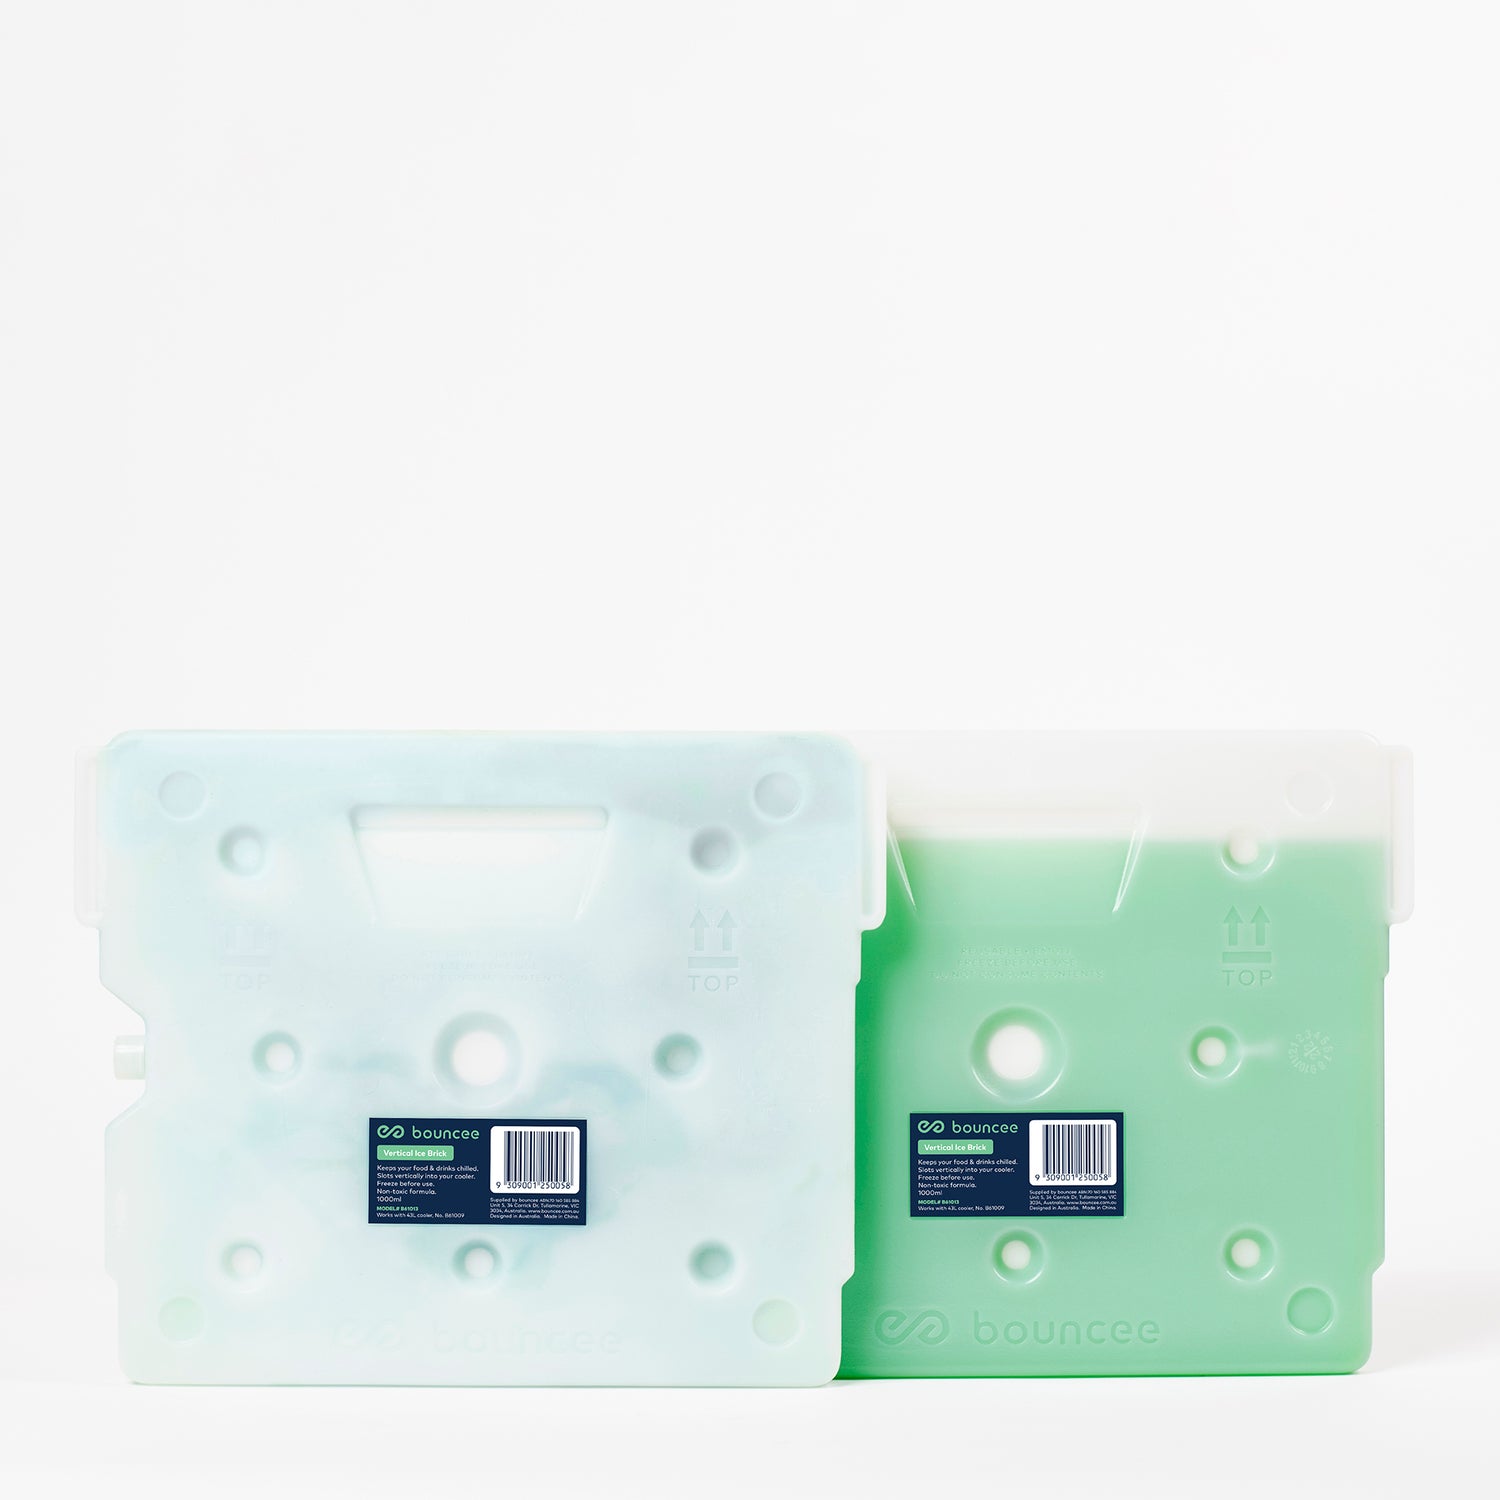
If your bouncee ice bricks are fully frozen, you will not be able to see any green liquid, only light blue ice!
Bouncee’s ice bricks are considered thin with a high surface area. They should freeze quicker than most other off-the-shelf models, and usually, 12-24 hours is sufficient. They are also more fluidic than most gel packs, and it is easier to see how much ice you have left by looking for green liquid.
After you have fully frozen your ice bricks, be sure to take them straight from the freezer and into the cooler. Think of them as a battery being turned on from the moment they come out of the freezer. The longer you leave the ice bricks on the kitchen bench or in the cooler with an open lid while packing, the more energy you lose before the adventure has even started.
Signing off:
Now you know what to look for; you can do some tests in your freezer and get a feel for how long everything takes. Key things to remember - check the colour has completely changed, the ice pack is fully hard, and no liquid is moving around. And, of course, get them into the cooler quickly!
Remember, bouncee coolers are designed, made and supported in Aus – feel free to contact us with any questions.